Lesson 1
Introducing Isometric Drawing
Skills
Isometric Drawing using technical drawing conventions
Learning Capability
Critical Thinking
Foundational Skills
Numeracy
Lesson aim: Isometric Drawing
The class will begin with watching this video from Visual Communication Victoria focusing on Part 1 - the Isometric component as a guide into Isometric Drawing - visualising the work they will be producing.
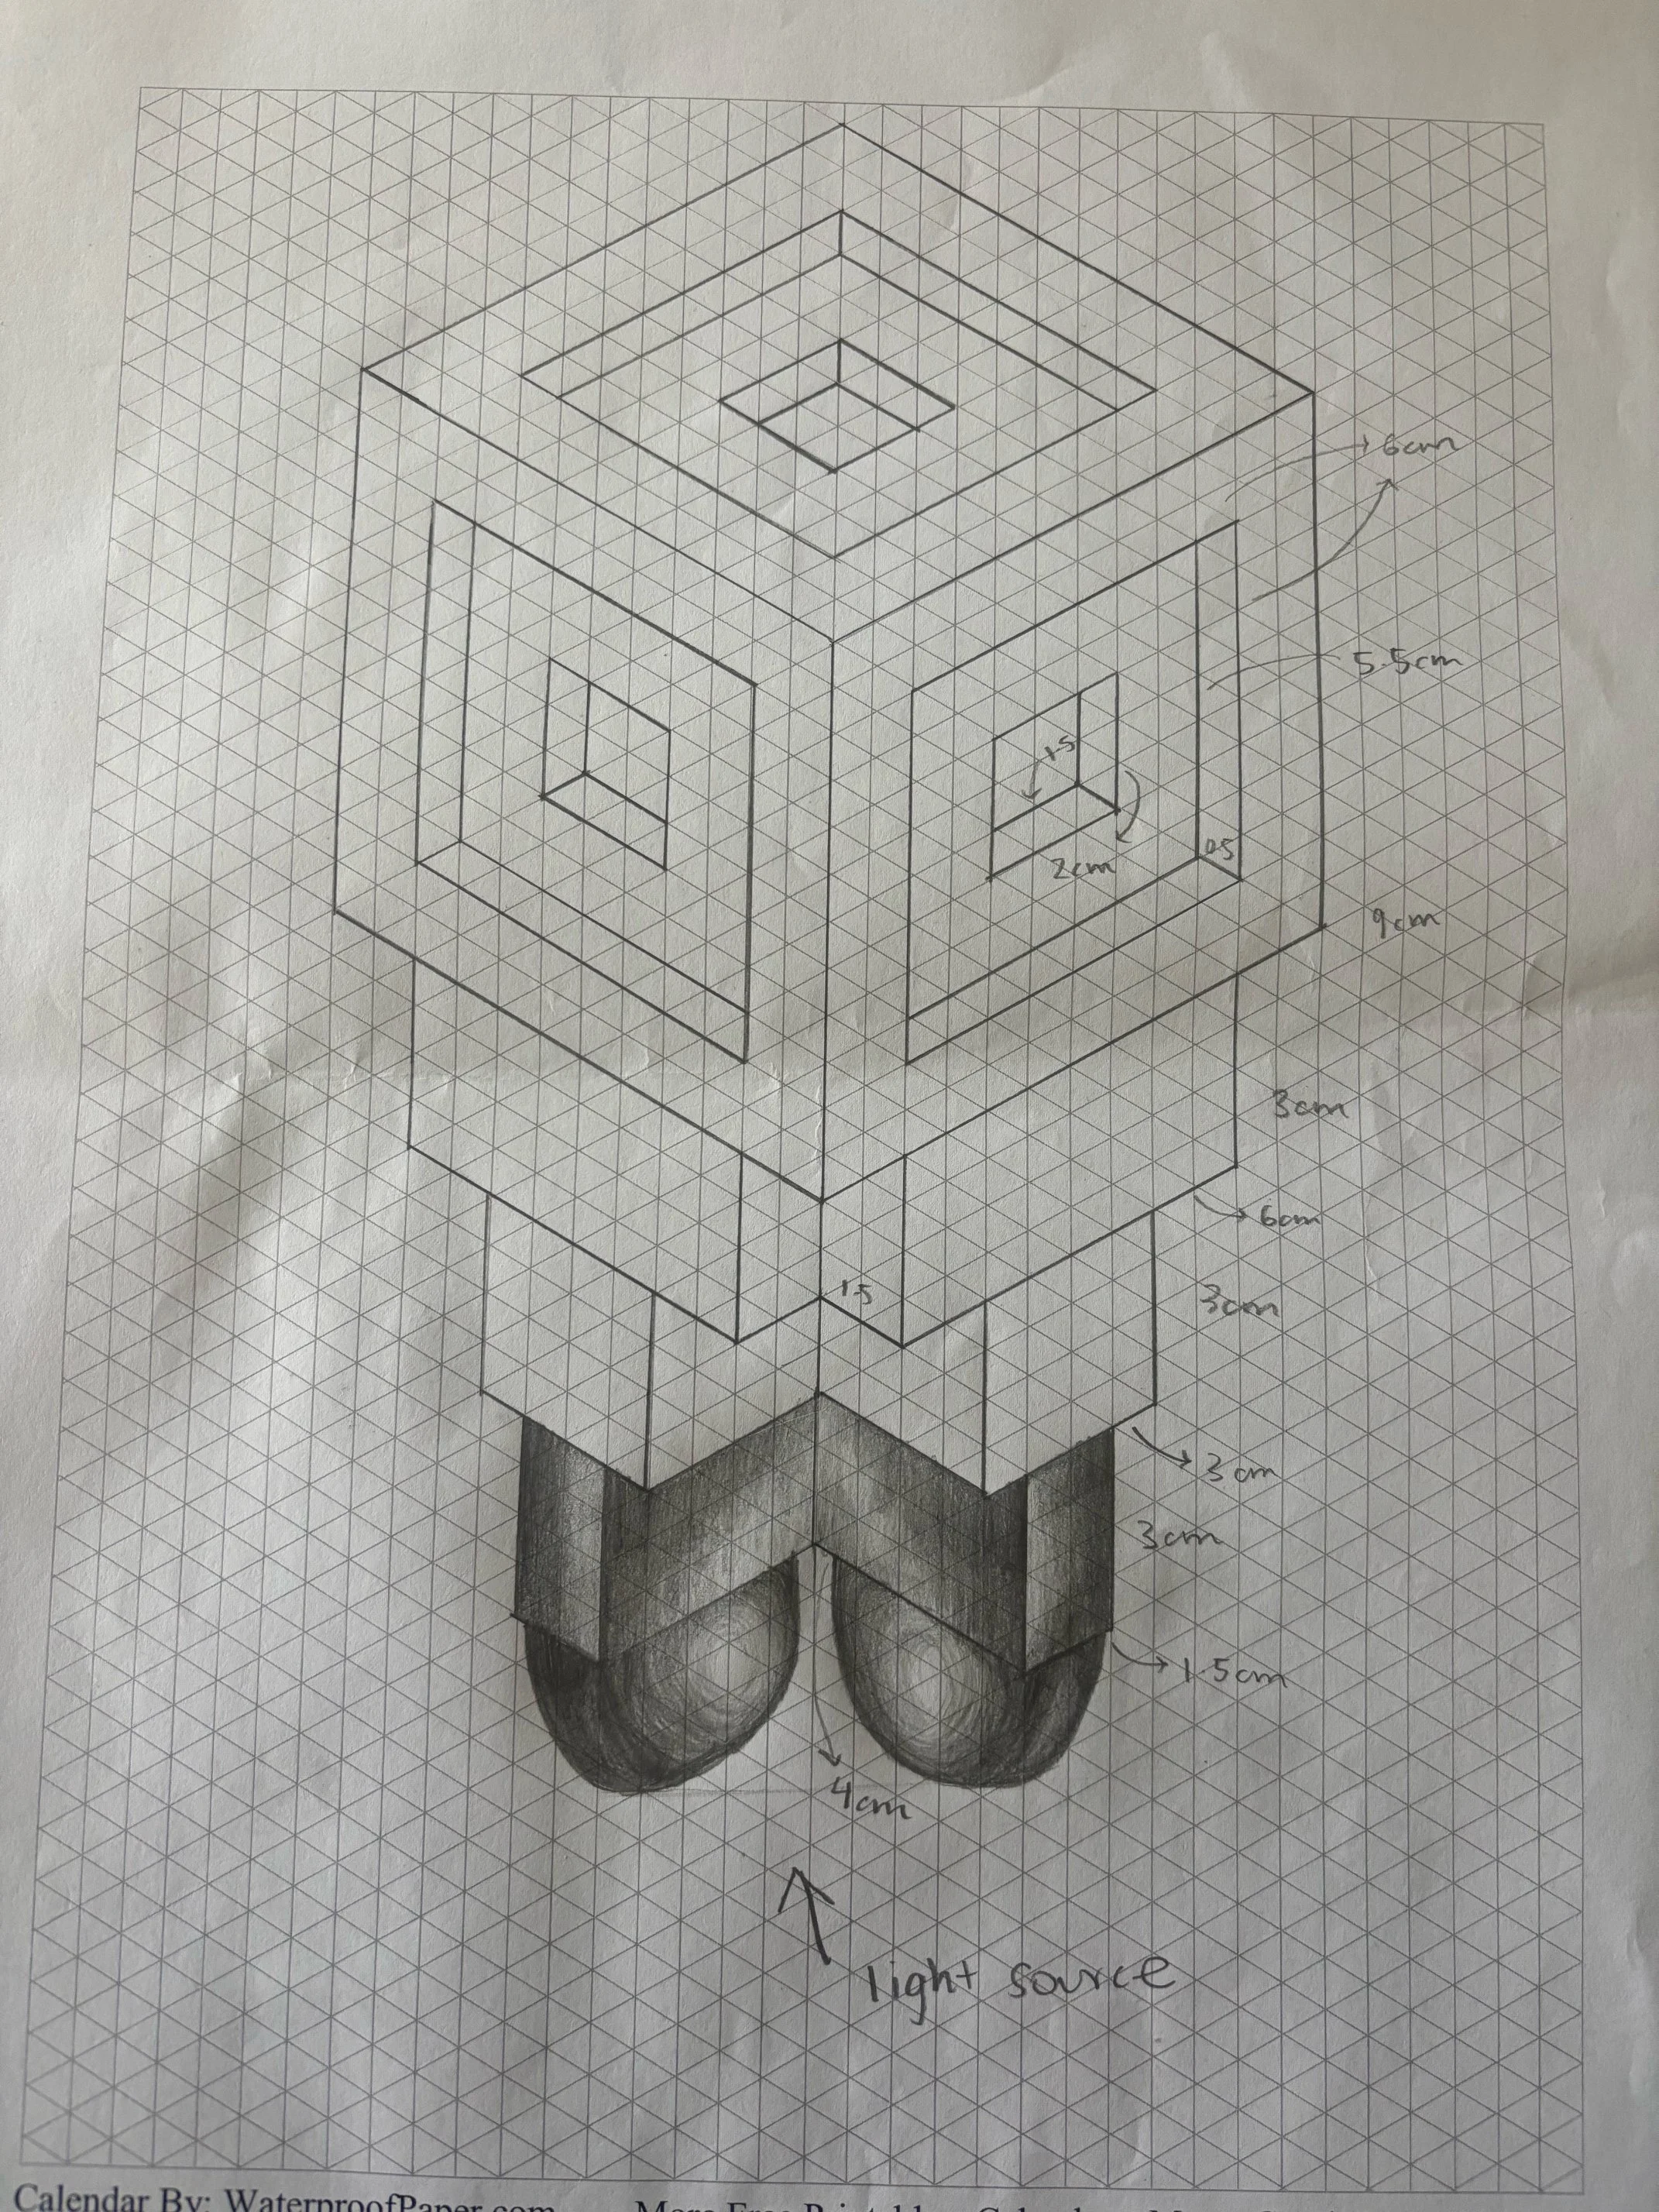
To provide the class with insight and inspiration into the process they are about to partake in throughout this lesson sequence, the teacher will then show them this Work by Oliver Nueland called ‘SlimRide’. The goal is to inspire students and allow them to visualise how concepts begin with a three-dimensional sketch, then developed into a digital design, and can become a physical prototype. The conventional drawing requirements will be introduced as a class discussion, encouraging a collaborative approach - using the VCAA Technical Drawing Conventions Years 7-10 pdf, to understand the importance, clarify questions as a group, and alleviate any confusion with this task before they commence their own work.
Students will be introduced to the design brief of the Robot they will be working on, will begin drawing cubes, and build their design from there based on the isometric/conventional drawing guidelines.
Body/main task:
Students will continue to work independently, practicing with grid lined paper with set squares and table rulers. They will be asked to come to the front of the class to participate in a worked example from the teacher, allowing students to witness a visual demonstration as the class is about to transition to plain A3 paper. This will be using a projector ensuring all students can see, and no one is at a disadvantage - incorporating the ‘I do, we do, you do’ approach for effective learning. Once students feel comfortable with their design, and are able to visualise a three-dimensional object - students will begin drafting ideas for their Robot on plain A3 paper. Expanding on the idea of a cube for its head/body - and developing it from there. The teacher is to ensure the conventional drawing conventions are top of mind when students transition to plain paper. This will act as the perfect opportunity for the teacher to monitor students’ participation and provide further assistance to those who may require it. Understand which components may not have been introduced clearly, and determine whether this content needs to be clarified further to ensure students can succeed and produce satisfactory work.
Clean up/pack up:
Advising students to bring their oil based pencils with them the following lesson, as they will commence rendering next session. Students will place work in A3 folders. If equipment was borrowed - it is to be returned, table rulers back to the rack (table groups - one group at a time), folders back to their drawer/tub on way out.
Lesson conclusion/student reflection:
Ultimately the teacher must reflect on how students found the task. Were they engaged? How far along is their progress in the task - where does the class pick up from in the next lesson. Do students need additional time to complete drawing, or can the class proceed to rendering?